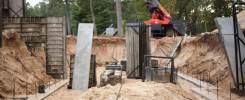
With the forms stripped to show the finished concrete, the framing is ready to begin. Here you can see the subtle lines of the separate pours of concrete rising diagonally up the walls. Had this been on the outside where the walls are being left exposed, there would have been a problem. If you are leaving concrete exposed, make sure it is very clear to your contractor that the exposed sections need to be poured continuously out of one truck and not separated.


This is the front retaining wall that will create the outdoor living area. The 3 small holes are junction boxes for lights that will be installed much later. The key here is planning ahead, and even though lights are a long ways off in the process, we need to be thinking about how the power will get to them and where they will be mounted now.
FWAZ’s and Reverse Framing Ledge’s.
A couple of subtle, but important details in this photo. The RFL is something we use on a lot of our projects for a couple of reasons, and you can see it here in the lower right corner of the photo where the concrete foundation wall steps down. The biggest reason is it allows us to bring grade up much closer to the finished floor while protecting the wood framing from ground contact and moisture. A common detail you see on a lot of homes is to install a layer of metal flashing against the wood, and pour the concrete directly up against it. That is a cheaper approach, but long term we like concrete much more. Now, instead of having multiple full height steps up to the front door or to get to outdoor living areas, there is just a small 4″ step.
One small mis-step on my part here was I made the decision to not run the RFL around the entire foundation, mostly for budget reasons as the ledge costs about an extra $20 per foot of wall. I thought we had enough of a grade drop for the site to naturally adjust as we worked our way around from the front door, but the site was actually a bit flatter than I thought. We ended up having to raise the whole foundation about 12″ further than I wanted to and raise the grade at the front entry to accomodate it. It all worked out in the end, but I’m sure I probably actually ended up spending more in the end that if I would have just run the RFL all the way around.
The FWAZ is a the small metal bracket you see at the bottom of the rim joist. It provides a much stronger point of contact for the wood framing to the foundation wall. One of the hidden functions of the floor framing system is it actually braces the top of the foundation wall and keeps it from tipping in from ground pressure after backfilling the site.
A week later, the site is backfilled, the main floor structure is in place, and the walls are coming up. The spaces are starting to take shape and views from windows are beginning to come to life. Before backfilling, we were sure to get drain tiles and anything else that needs to be installed underground in place.


